how to install metal roofing
Table of Contents
Preparing For Your Metal Roof Installation
Getting ready for a metal roof installation is a big step, and doing it right from the start saves a lot of headaches later. If you’re in the Austin area and thinking about a new roof, Capital City Roofing can help guide you through this. A solid preparation phase is key to a successful project, especially when dealing with something as important as a metal roof Austin homeowners trust.
Assess Existing Roof Structure
Before you even think about ordering materials, you need to check out what you’ve got now. Is the underlying wood decking solid, or is it soft and rotten in places? You’ll want to tap on it, maybe even poke a little with a screwdriver in a few spots (carefully, of course). Any signs of water damage or mold mean you’ve got more work ahead. This is also the time to figure out if your current roof structure can handle the weight and wind load requirements for a metal roof. Sometimes, you might need to add extra bracing. It’s better to find these issues now than when the new panels are ready to go on.
Gather Necessary Tools and Materials
So, you’ve got your metal panels, but what else do you need? Think about safety gear first: sturdy work boots, gloves, safety glasses, and a harness if you’re working on a steep pitch. For tools, you’ll likely need a good circular saw with a fine-tooth blade for cutting panels (or a specialized metal shear), a screw gun with the right bits for your fasteners, a chalk line for straight runs, a tape measure, tin snips, and a caulk gun for sealants. Don’t forget things like a ladder, possibly scaffolding, and a way to haul materials up. Having everything on hand before you start makes the whole process smoother. If you’re unsure about what’s needed for a metal roof Austin project, Capital City Roofing has the experience to advise.
Understand Local Building Codes
This part is super important and often overlooked. Every city and county has its own rules about building and roofing. You need to find out what permits are required for a metal roof installation in your area. There might be specific requirements for underlayment, fastening patterns, or even the type of metal allowed. Ignoring these codes can lead to fines or having to redo work, which nobody wants. A quick call to your local building department or checking their website is usually the best way to get this info. It’s a necessary step, just like getting a roof leak repair Austin might need if not installed correctly.
Preparing properly means less stress and a better final result. It’s about being thorough and thinking ahead, which is what we aim for at Capital City Roofing.
This initial phase sets the stage for everything that follows. Taking the time to do it right means your new metal roof will look great and perform well for years to come. It’s a significant investment, and proper preparation is the first step to protecting that investment.
Removing The Old Roofing System
Safely Strip Shingles Or Other Materials
Getting rid of your old roof is the first big step. If you have asphalt shingles, you’ll want to use a roofing shovel or a flat spade to pry them up. Work from the top of the roof down, and try to get as many shingles off in one go as you can. For other materials like wood shakes or tiles, the process might be a bit different, so know what you’re dealing with. Safety is super important here, so wear gloves and sturdy shoes. If you’re in Austin and worried about this part, especially if you suspect a roof leak, calling Capital City Roofing is a smart move. They handle all sorts of roof tear-offs and know how to do it right, which can save you a lot of hassle and potential damage.
Inspect And Repair Decking
Once all the old roofing material is off, you need to look closely at the roof decking underneath. This is usually plywood or OSB. Check for any spots that look soft, rotten, or water-damaged. If you find any weak areas, you’ll need to cut out the damaged section and replace it with new decking. This step is really key for the longevity of your new metal roof. A solid base makes all the difference. If you’re unsure about the condition of your decking or need help with repairs, Capital City Roofing can assess it for you. They’re experts in metal roof Austin installations and make sure the foundation is sound.
Clear Debris From The Roof
After you’ve stripped the old materials and fixed any decking issues, you’ve got to clean up. Get all the old shingles, nails, and any other junk off the roof. You don’t want anything left behind that could cause problems later or get in the way of installing the new metal panels. A good sweep or blowing off the roof surface works well. Make sure to also clear out the gutters and downspouts. This might seem like a small thing, but it’s part of making sure everything is ready for the new roof and that water will flow correctly. If you’re dealing with a persistent roof leak in Austin, getting this cleanup done properly is part of the fix, and Capital City Roofing can help with that too.
Installing The Underlayment And Flashing
Before the actual metal panels go on, getting the underlayment and flashing right is super important. Think of it as the first line of defense against water. If this part isn’t done well, you might end up needing a roof leak repair in Austin sooner than you think.
Apply Synthetic Underlayment
Forget those old felt papers; synthetic underlayment is the way to go for a modern metal roof Austin installation. It’s tougher, lasts longer, and doesn’t get soggy if it gets wet during the installation process. You’ll want to roll it out horizontally across the roof deck, starting at the bottom and working your way up. Make sure each layer overlaps the one below it, usually by about 6 inches, and the side laps overlap by about 4 inches. Secure it with the recommended fasteners, like cap nails or staples, keeping them spaced according to the manufacturer’s instructions. Properly installed underlayment creates a secondary water barrier.
Install Drip Edge And Eave Protection
Next up is the drip edge. This is a metal flashing that goes along the edges of your roof – the eaves (bottom edges) and the rakes (sloping side edges). It directs water away from the fascia and into the gutters. You’ll typically install the eave drip edge first, under the underlayment. Then, the rake drip edge goes over the underlayment. This helps prevent water from getting under the roofing material at these vulnerable spots. For extra protection, especially in areas prone to ice dams, consider installing an ice and water shield membrane along the eaves before the drip edge.
Properly Place Valley Flashing
Valleys are where two roof planes meet, and they handle a lot of water. Getting the flashing right here is critical for preventing leaks. There are a couple of ways to do this with metal roofing. One common method is to install a pre-formed valley flashing, often called a ‘W’ valley or a ‘K’ valley, before the panels. Another approach is to use a field-formed valley, where you cut and shape the metal panels themselves to create the valley. Regardless of the method, you need to make sure the flashing extends up the roof planes sufficiently and is properly sealed. This is a job where precision really matters, and Capital City Roofing knows how to get it done right.
Working with metal roofing requires attention to detail, especially in areas where water collects or transitions. Getting these flashing details correct from the start saves a lot of headaches down the road.
Attaching The Metal Roofing Panels
Now that your underlayment and flashing are in place, it’s time to get those metal panels onto your roof. This is where the actual ‘metal roof’ part starts to take shape, and it’s important to get it right. Proper installation is key to a long-lasting, leak-free roof. If you’re in the Austin area and need help with your metal roof installation or are dealing with a roof leak repair in Austin, Capital City Roofing is here to help.
Layout And Position First Panel
Before you start screwing anything down, you need to figure out where your first panel goes. Usually, you start on one side of the roof and work your way across. Make sure the panel is straight and has the right amount of overhang on the edge. A little overhang helps water run off properly. You’ll want to check this with a level. Getting this first panel perfectly aligned makes the rest of the job much easier. It’s like laying the first brick in a wall; if it’s crooked, everything else will be too.
Secure Panels With Approved Fasteners
Once the first panel is positioned, you’ll start fastening it down. The type of fasteners you use matters a lot. Your metal roofing supplier will tell you what’s best for your specific panels. These are usually screws with a rubber washer that seals the hole. Don’t overtighten them, or you can strip the hole or damage the washer. Just snug is usually good. You’ll put fasteners in specific spots, often along the edges and in the middle, following the manufacturer’s instructions. This is a step where mistakes can lead to leaks later, so pay attention to the details.
Overlap And Seal Seams Correctly
Metal roof panels often overlap each other. How you overlap them and seal those seams is really important for keeping water out. Some systems have a standing seam where the edges lock together, and others might have a simpler overlap. Whatever your system, make sure the overlap is correct and that any sealant or tape recommended is applied properly. This creates a barrier against rain and wind. Think of it like shingles overlapping; each one protects the one below it. For a metal roof Austin homeowners trust, getting these seams right is a big part of the job.
Working with metal panels can be tricky. They can be heavy and awkward to handle, especially on a sloped roof. It’s often a two-person job to maneuver them into place safely and accurately. Always wear appropriate safety gear, including gloves and sturdy shoes.
Completing Ridge Cap And Trim Installation
Now that your metal roof panels are in place, it’s time to finish things off with the ridge cap and trim. This part is really important for both the look and the performance of your new roof. Think of it as the final trim on a custom-built house; it just makes everything look complete and professional. For anyone in the Austin area looking for a solid metal roof, Capital City Roofing knows how to get this done right. They handle everything from initial installation to any needed roof leak repair austin residents might require down the line.
Install Ridge Cap For Ventilation
The ridge cap isn’t just for looks; it’s a key component for your roof’s ventilation system. It covers the peak of your roof where two slopes meet. Proper installation here allows hot, moist air to escape from your attic, which helps prevent moisture buildup and keeps your home cooler in the summer. Without good ventilation, you can end up with problems like mold or even structural damage over time. Capital City Roofing makes sure this is installed correctly, giving your metal roof Austin performance it deserves.
Attach Hip And Rake Trim
Hips are where two slopes meet on the exterior of your roof, and rakes are the edges that run from the eave to the ridge. Trim pieces are installed along these lines to protect the edges of the metal panels and to give a clean, finished appearance. They also help direct water away from the roof structure. Getting these pieces fitted precisely is what separates a good metal roof installation from a great one.
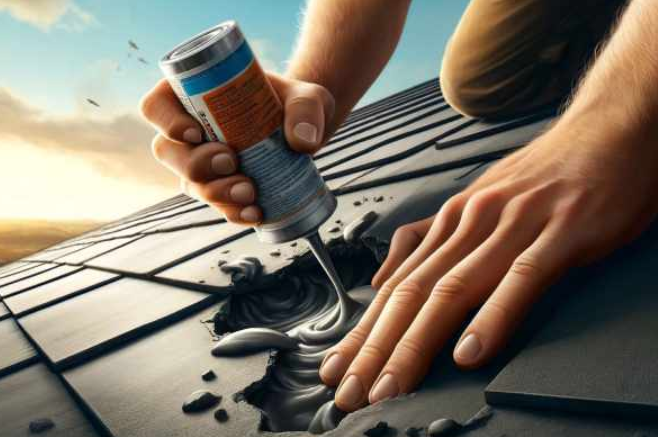
Seal All Exposed Fasteners
Even with the best metal roofing panels, you’ll have fasteners – screws or nails that hold everything down. Any place where a fastener goes through the metal is a potential entry point for water. That’s why it’s so important to seal these. Most metal roofing systems come with special rubber washers that seal around the screw head. If you’re not using self-sealing screws, you’ll want to apply a high-quality sealant to each fastener after it’s driven. This step is small but mighty when it comes to preventing leaks, and it’s something Capital City Roofing always pays close attention to, especially when dealing with roof leak repair austin homeowners might need.
Don’t skimp on the trim and ridge cap. It might seem like extra work, but these details are what keep your metal roof looking good and performing well for decades. It’s the difference between a roof that just sits there and one that actively protects your home.
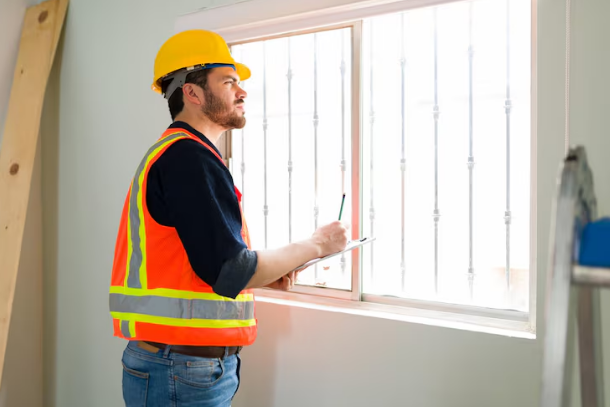
Final Inspection And Cleanup
Now that your new metal roof is on, it’s time for the final checks. This is where you make sure everything is buttoned up tight and looks good. Think of it as the last pass before calling the job done. We want to make sure your investment is protected and that your new roof is ready to handle whatever the weather throws at it. For homeowners in the Austin area, getting this right is key, especially with our Texas storms. If you’re looking for a reliable metal roof Austin installation or need roof leak repair Austin services down the line, Capital City Roofing is here to help.
Check For Any Loose Panels Or Trim
Walk around the entire perimeter of your house and look up. Are all the panels sitting flat? Is any of the trim, like along the eaves or the ridge, looking a bit wobbly? Give them a gentle push to see if they feel secure. Loose bits can be a weak spot, letting water in or just looking sloppy. It’s better to catch these small things now than have them become a bigger problem later.
Remove All Construction Debris
This means getting rid of any leftover screws, metal scraps, bits of underlayment, or even empty caulk tubes. Don’t forget to check the gutters and downspouts – they can easily catch all sorts of junk during installation. A clean site is a safe site, and it just looks a lot more professional. Plus, you don’t want to be stepping on sharp metal bits in your yard.
Ensure Proper Gutter Functionality
With the new roof in place, water should be flowing correctly into your gutters. Check that the gutters aren’t clogged with any installation debris. Make sure the water is actually draining away from your foundation. Sometimes, during installation, gutters can get slightly out of alignment, so a quick check to see that water is moving freely is a good idea. This is a simple step that prevents bigger water damage issues later on.
This final inspection is your last chance to catch any minor issues before they potentially become major headaches. It’s a critical step in the installation process that many people might overlook, but it’s one that Capital City Roofing always prioritizes.
Wrapping Up Your Metal Roof Project
So, you’ve made it through the steps of installing a metal roof. It’s a big job, no doubt about it. You’ve learned about the different types of panels, how to measure and cut them, and the best ways to fasten everything down tight. Remember, taking your time and following the instructions carefully really pays off. A well-installed metal roof isn’t just about looks; it’s a solid investment that can last for decades, saving you money on energy bills and keeping your home protected. If you’re feeling confident, go for it! But if it feels like too much, there’s no shame in calling in a pro to get the job done right. Either way, you’re on your way to a great-looking, long-lasting roof.